Showing posts with label snowflakes. Show all posts

Monday, December 13, 2010

Snow and the Lucky One

Just now I got this message in my email box:

The We are happy to announce the grand prize winner of our Big Give-a-way!
Erica from Sweet Grass,  MT.   
To quote her she said "Oh my gosh!!!  I
am bouncing in my chair!!!"
We thank you all for playing our little word game, and wish all of you
the Happiest of Holiday's!!
A giant thank you to all of our designers that worked so hard to make
this Blog Hop a success!!

Henry Glass & Co.

That's exciting.  I will get my prize off to her tomorrow!  
I have a few pictures of the much requested room of snow flakes.  (Sorry, Minnesota, you are probably sick of snow.)  I hung them in my music room--it's just off the living room and the ceilings aren't vaulted, making it a little easier.  One house we lived in had high vaulted ceilings everywhere, so we hung the snowflakes in the main hallway.  It was still beautiful.

 I put up three small trees in here.  They are decorated very simply with just lights and silver jingle bells, and a few light green balls.  Some silver leaves here and there and shiny green ribbon finish it off.  Very simple.

This is a pretty small room, so it isn't hard to cover the ceiling with flakes.  But if you have a large room, you could try doing just around the border of the room, or maybe just above the Christmas tree, etc.


It really looks nice at night with the candles and twinkly lights, but my photo didn't work, so you have to see it in the day.  
The snowflakes don't just hang there still.  They turn slowly around with the air movement of people walking around, and heat off the candles, fireplace and the furnace.  Of course, pictures are never as good as the real thing.  But you get the idea.

Have you made any of the projects from the Holiday Project Parade?  I'd love to hear about it.

Saturday, December 4, 2010

Snowflake Tutorial

Hi everyone!
Thanks so much for all your comments on my blog!  Today is the last day to comment on my post of Dec. 3 to enter the prize drawings.  So if you have not yet, scroll down to my post and read all about it, make a comment and enter to WIN!
I love hearing from you.  I hope you are getting your questions answered here, or in the comments.  I had so many inquiries about how to do snowflakes, that here is a quick lesson. We use just regular white computer paper.  Start with a square.  You can do any size, but larger is easier to start with.
 Fold the square in half diagonally to make a triangle.  


Fold the triangle in half again, and just crease a little bit to mark the center.


 Open the  triangle back up so you can see the center crease.


 Starting from that center crease, fold in thirds.  This may take some adjusting.

 Fold the second third over, and adjust so that all the edges meet.

 Fold in half.

Cut the top points off so that you have 6 points inside.  If you cut straight across, you will have more of a circle.  The more slanted you cut, the pointier your snowflake will be.  

 Cut various shapes from both sides of the folded triangle, but don't cut all the way from one side to the other.

 Open it up, and it's a snowflake!


 Here's a few of us cutting.
After we open the snowflakes up, I take them to the ironing board, and lightly spray with spray starch, then press with a hot iron.  The starch helps to give them a little stiffness, and hold together better.  Don't get them too wet, and don't slide your iron, just press it down, lift and press.  Keep it there long enough to dry the starch.

 And here is what we cut.  So many different styles and sizes,  just like real snowflakes!

 Make some curvy,

 Some more pointy,

Some more round. 

Now for the hanging part.  We haven't gotten to that yet, so I don't have photo, but I can tell you what I do.  I tie a monofilament thread to each snowflake.  Use various lengths.  Stick it through one of the cut out holes, and tie it in several knots.  Attach to the ceiling with small pieces of scotch tape.  I used to use poster tack, that putty-like stuff that holds posters on the wall.  It works great if you can find the color that matches your ceiling.  (I haven't been able to find the right color lately, so I am stuck with  scotch tape--literally.)  
Hang them all together for impact.  I usually pick just one room to cover in snowflakes.  That makes it really special.  (You can also spray them with glitter, if you like, but that leads to "sparklies" all over everything. )
I will post a photo after we get them all hung up.  Well, now that was easy, wasn't it!  By the way, that's how I made the pattern for the Snowdrift Stocking.  (Downloadable here)  You could make your own snowflake pattern, or make each stocking different!

Today is the 5th day of our Holiday Project Parade.  Collect all those special words!  Today you will want to go see:

chelspurple2-1
Chelsea Andersen of Pink Fig Patterns 

                                                   head-shot-with-logo-copy

and Brenda Pinnick of Brenda Pinnick Designs.
I don't know either one of these gals personally, but I have been looking at all their designs, and they certainly are talented!  I can't wait to see their projects. 
I have had so much fun so far on this Parade!  Isn't it fun to get to know so many designers and see all their good ideas!  Keep hopping, and we will talk again tomorrow.

Friday, December 3, 2010

DAY 3--My Turn

 Hello everyone!  Welcome to my blog!  I'm glad you're here, because today is my day to post a project for the Henry Glass Designer's Holiday Project Parade.  I'm Jill of Jillily Studio, and I love to quilt.  I have been busy designing fresh new quilts for about 15 years now.  I have been so blessed to be in this industry and be able to be creative and play with fabric almost every day!

I also have created a few notions that are really catching on.  Appli-Glue
is an archival quality basting glue, watch the video about it here.  And my newest notion, Poke-A-Dots is so new it hasn't even hit the stores yet!  But I sold a ton at Market and they will be shipping soon, so watch for these cute sticky thimbles any time now!  I will have more info about the Poke-A-Dots in the next few weeks.

I have been designing fabrics for Henry Glass for a few years now, and it is about the most fun you could ever have!  Currently I have two fabric lines: "Thistledown" (which is in stores now) and "Elizabeth's Letters" (which will be in stores in January).  I posted about them yesterday, so you can see them on my previous post.   Here's a quilt I was working on using the "Thistledown" line:

Not done yet!  Still doing applique!
A close up of "Daisy Dot" after the quilting
And here's a peek at a quilt which will be coming out in American Patchwork and Quilting in February.  I used Elizabeth's Letters to make "Blackberry Village."
On the design wall--"Blackberry Village"
 I have had several projects featured in American Patchwork and Quilting, and in their calendar.  They are wonderful to work with and the photos and patterns always turn out great.  Watch for "Blackberry Village" early next year.

You can check out all my patterns and projects on my site, (I have 4 new patterns) or at your local quilt shop, or in my book.  Stitched Together is published by Kansas City Star has 13 projects and lots of fun stories and information about quilt retreats.
My Book
Well, let's get on with it!  I have a fun project for you. 
Snowdrift Stockings
 These cute stockings have plenty of room for Santa to fill.  He may even leave you a CANDY CANE. (Important Note: That is my "special word"  which you will want to make note of so you can WIN the Grand Prize.  Remember you need to collect all 17 words to enter at the end.)
These are really easy and you can add as much detail and bling as you like.  Check out that snowy cuff!  And I happen to love snowflakes, so there you go.  You may have noticed that I used some fabrics from the Thistledown line to make these.  The red stocking is lined in green and the green one is lined in red.


I do have KITS available, so if you want one, go here.  Each kit makes 2 stockings and includes all the fabrics and ribbon, but no batting.  Cost $18.00.
The pattern for Snowdrift Stockings can be downloaded  here.

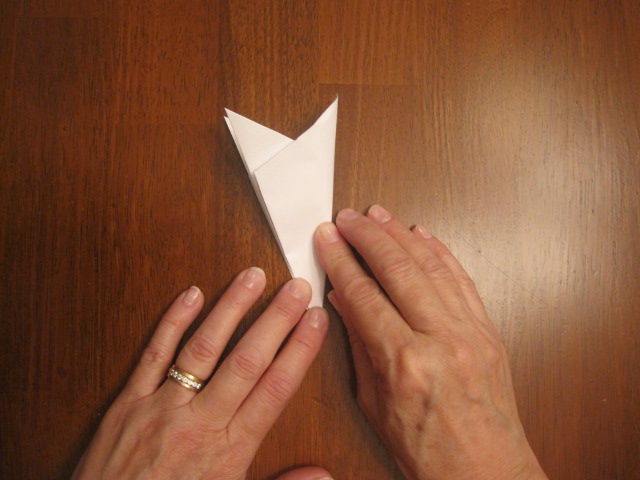
Speaking of snowflakes, we have a family tradition of cutting and hanging new snowflakes every year.  When I married my sweetheart in December, 34 years ago, (wOw--I didn't know I was THAT old!) we had the reception at my home.  We hung a snowflake every 12" of the whole ceiling. It was magical.  So every year we cut and hang paper snowflakes from the ceiling.  We haven't done it yet this year--the cutting party is this weekend, complete with the first (of many) showings of "It's A Wonderful Life", hot cocoa, cookies, and lots of people I love!  Here's a pic of some snowflakes from last year.


 Before I wrap this up, I have a gift give-away.  Sign up as a follower and make a comment on this post.  I will send one lucky winner a fat quarter bundle of Elizabeth's Letters, and someone else a copy of my book!  Now that's great.
But to make it even better, I am doing a separate drawing on my facebook page.  Come be my "friend" on Facebook, and you have another chance to win a fabric bundle with a pattern.
(You see, I just started doing the Facebook thing, and I have no friends.  So I have to bribe you.)  Both contests have until Sunday evening, 12-5-10 to enter.  Good Luck!


Now off you go-- hop over Jacqueline Steve's blog at The Noble Wife.
She is a new designer for Henry Glass Fabrics and she is so generous and sweet.  I'm glad to be getting to know her!  You will love all her designs.

Happy hopping.  Come back often and we will visit!