
Thanks so much for all your comments on my blog! Today is the last day to comment on my post of Dec. 3 to enter the prize drawings. So if you have not yet, scroll down to my post and read all about it, make a comment and enter to WIN!
I love hearing from you. I hope you are getting your questions answered here, or in the comments. I had so many inquiries about how to do snowflakes, that here is a quick lesson. We use just regular white computer paper. Start with a square. You can do any size, but larger is easier to start with.

Fold the square in half diagonally to make a triangle.

Fold the triangle in half again, and just crease a little bit to mark the center.


Fold the second third over, and adjust so that all the edges meet.
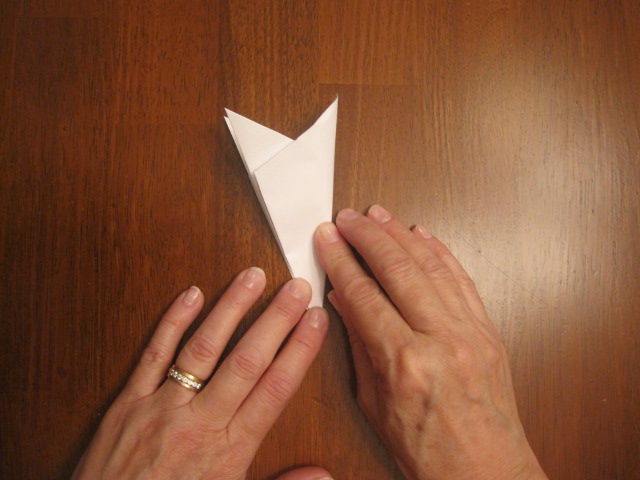
Fold in half.

Cut the top points off so that you have 6 points inside. If you cut straight across, you will have more of a circle. The more slanted you cut, the pointier your snowflake will be.

Cut various shapes from both sides of the folded triangle, but don't cut all the way from one side to the other.

Open it up, and it's a snowflake!

Here's a few of us cutting.
After we open the snowflakes up, I take them to the ironing board, and lightly spray with spray starch, then press with a hot iron. The starch helps to give them a little stiffness, and hold together better. Don't get them too wet, and don't slide your iron, just press it down, lift and press. Keep it there long enough to dry the starch.

And here is what we cut. So many different styles and sizes, just like real snowflakes!

Make some curvy,

Some more pointy,

Some more round.
Now for the hanging part. We haven't gotten to that yet, so I don't have photo, but I can tell you what I do. I tie a monofilament thread to each snowflake. Use various lengths. Stick it through one of the cut out holes, and tie it in several knots. Attach to the ceiling with small pieces of scotch tape. I used to use poster tack, that putty-like stuff that holds posters on the wall. It works great if you can find the color that matches your ceiling. (I haven't been able to find the right color lately, so I am stuck with scotch tape--literally.)
Hang them all together for impact. I usually pick just one room to cover in snowflakes. That makes it really special. (You can also spray them with glitter, if you like, but that leads to "sparklies" all over everything. )
I will post a photo after we get them all hung up. Well, now that was easy, wasn't it! By the way, that's how I made the pattern for the Snowdrift Stocking. (Downloadable here) You could make your own snowflake pattern, or make each stocking different!
Today is the 5th day of our Holiday Project Parade. Collect all those special words! Today you will want to go see:

Chelsea Andersen of Pink Fig Patterns
and Brenda Pinnick of Brenda Pinnick Designs.
I don't know either one of these gals personally, but I have been looking at all their designs, and they certainly are talented! I can't wait to see their projects.
I have had so much fun so far on this Parade! Isn't it fun to get to know so many designers and see all their good ideas! Keep hopping, and we will talk again tomorrow.
13 comments:
Those are really great snowflakes. It's been a long time since I did one. You guys get really beautiful ones going! Nice job!
Thanks Jill! I did this with my nieces and nephews yesterday and it was really fun. They loved taking turns opening each one.
I wish I could have been there for the party! I had my own snowflake making party, but it wasn't as fun. All the kids here are really impressed with our family's snowflake skills.
Beautiful snowflakes! Can't wait to see your photo of them all hanging up. Thanks for the instructions!
I remember making these snowflaces years ago! I had forgotten how to fold the paper. Thanks for the tutorial!
Thanks so much for that, they are a-ma-zing!!!
Those are amazing snowflakes -- you are experts! Thanks for the idea and the tutorial!!
Wow what great snowflakes!
What a fantastic collection of snowflakes! It looks like great fun to have a group help make them!
We hung a flurry of snow flakes from the family room ceiling years ago when my oldest two were off track in December. Thanks for the reminder of how much fun this can be. I'll be hanging snow flakes again this year with my two youngest!
Those are, without a doubt, the most beautiful paper snowflakes I have ever seen. I will need to do some experimenting to see if I can make anything nearly as pretty. Thanks so much for sharing this info!
The snowflakes are beautiful. I think a snowflake party is just what my family needs.
Love the snowflakes! Thanks for posting and showing all of the different designs:)
Laura T
Post a Comment